
Step 1: Choose Your Image
Firstly, you need to choose an image to work with. We have chosen a panda because Conall felt the need to incorporate it, and something unusual is typically called 'indie', so it fits. In addition, it raises awareness in light of recent panda extinction awareness press. For the album cover, we chose two photographs that I took.

Step 2: Crop The Image
We naturally need to remove the 'comical' captioning of the image, simply leaving the image of a scared panda.

Simply select the cropping tool to the left side of the page and drag the sides of the box, so all of what you want to keep is highlighted, and the remainder is blacked out.
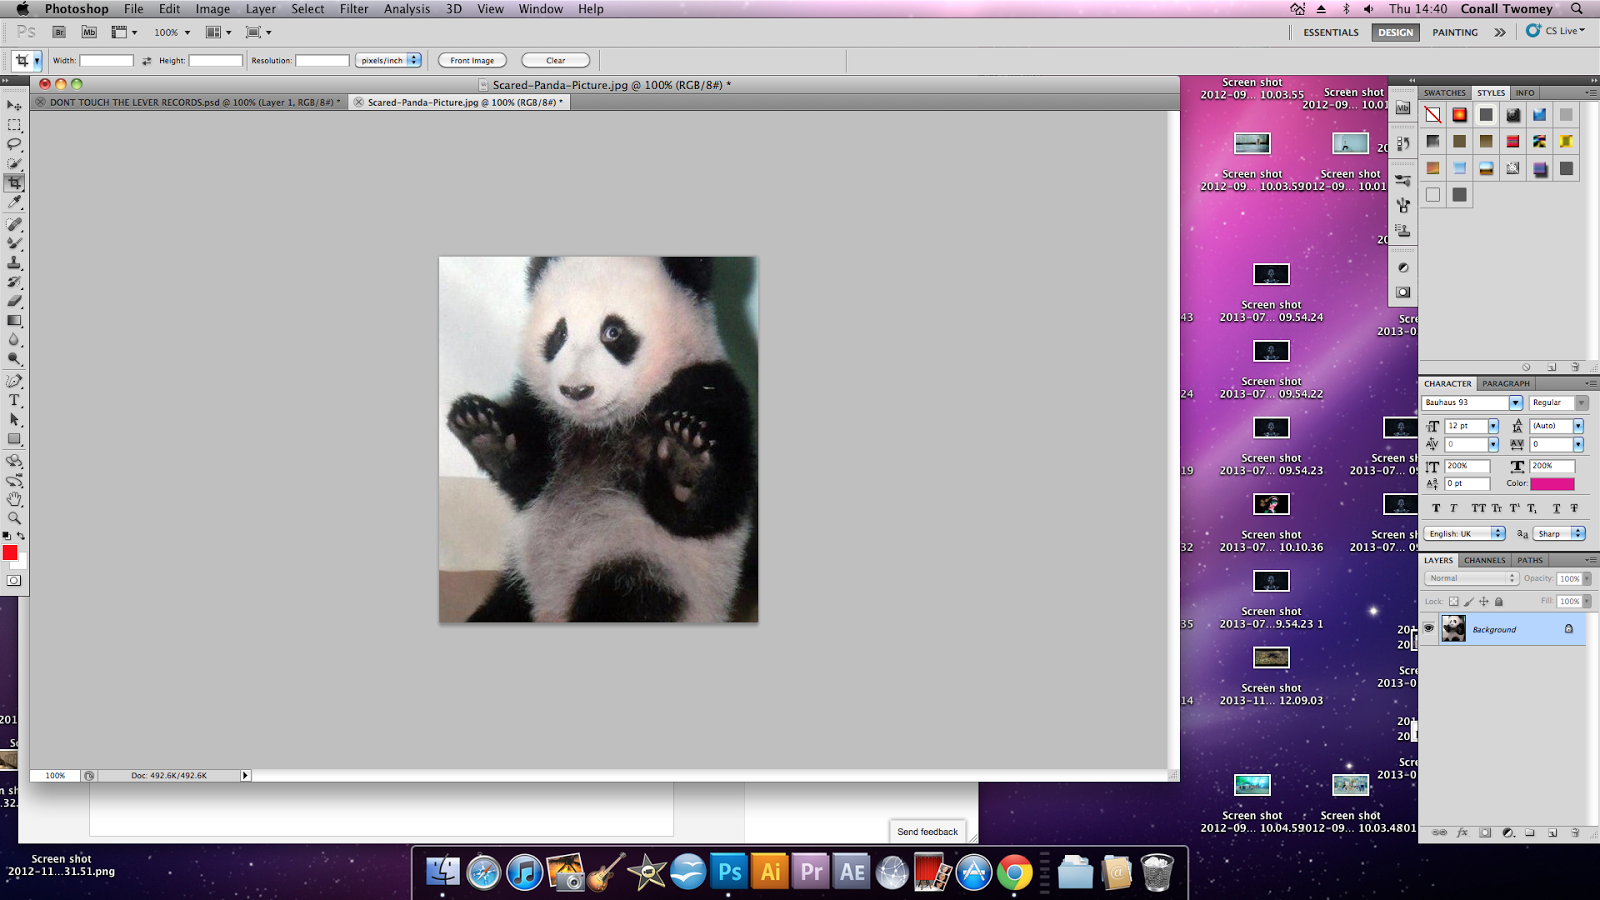
You should end up with something looking like this:
Step 3: Using Gradient Map
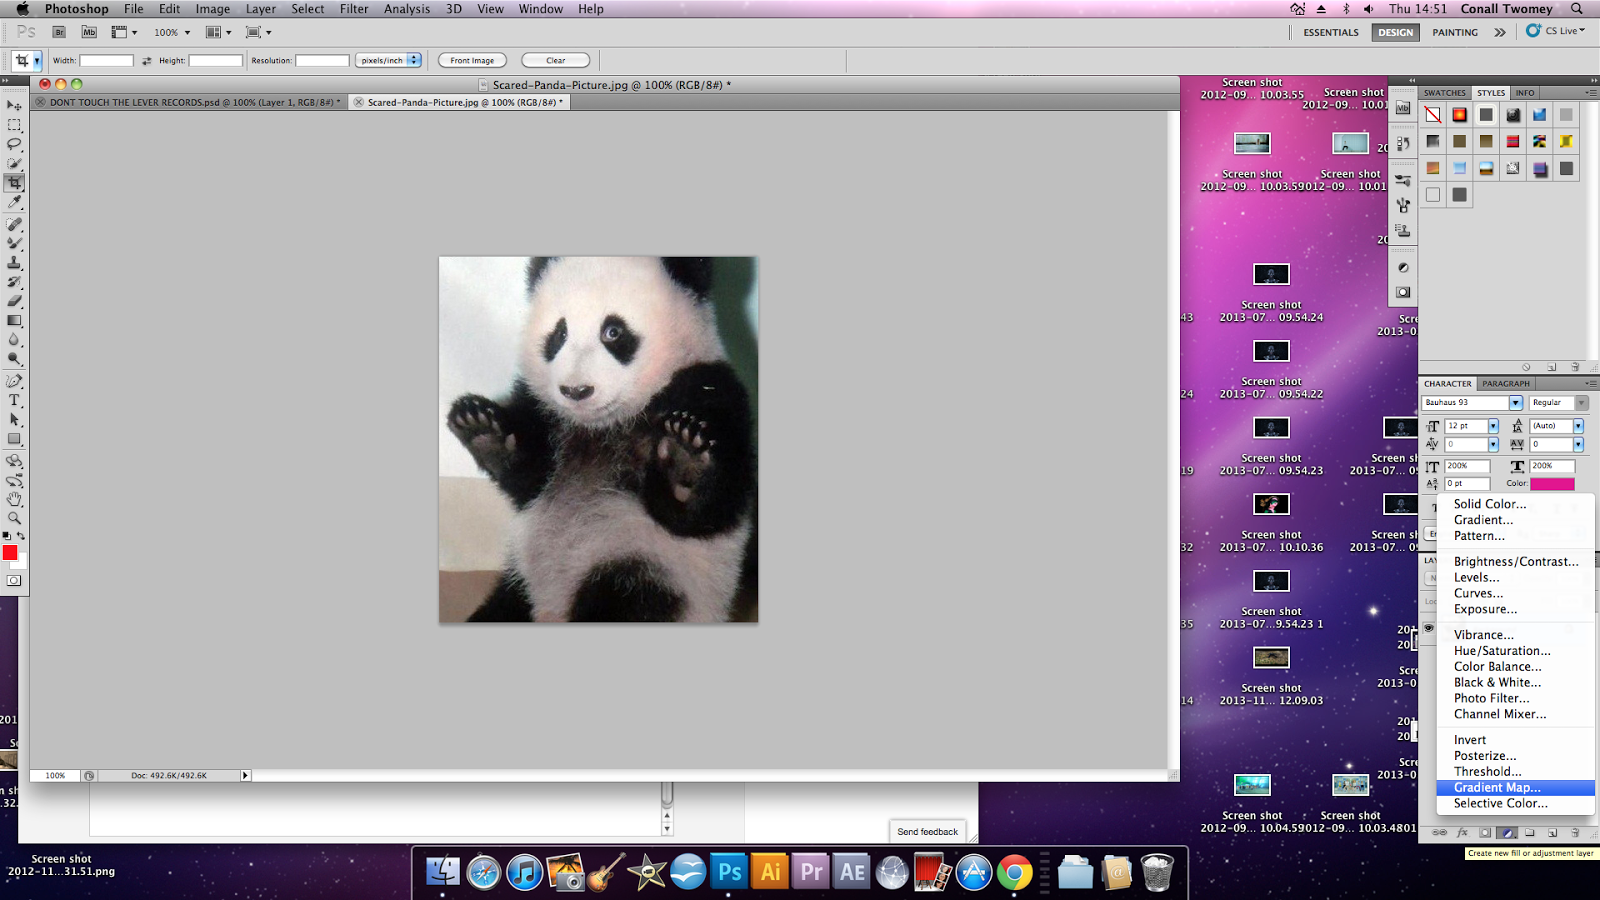 Next, click on the Fill or Adjustment Layer Button. Select Gradient Map from the drop-down list.
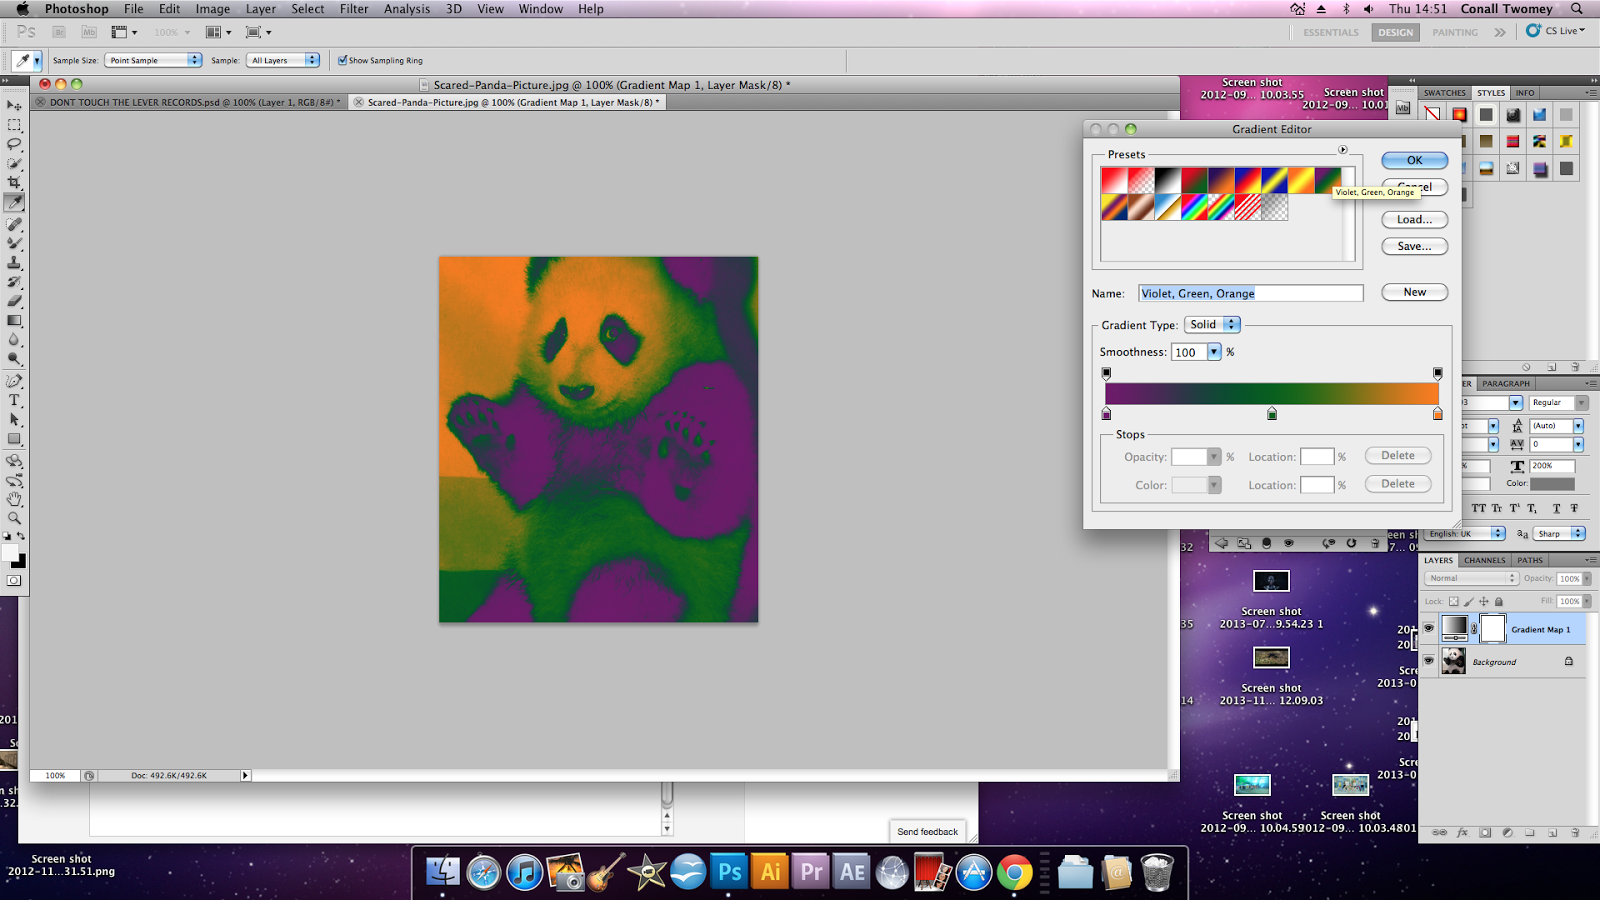 A wide palette of colours will appear, including a slider with all colours and a selection of gradients. To achieve the effect we need, select the Violet, Green and Orange option.
 Step 4: Adding Text
 Finally, click on the text button, "T", on the toolbar the left hand side of the screen. Choose what kind of text you want, the font, colour and where you would like it located. We went for a retro-disco like font in startling pink to contrast to the other bright colours we used. Here is the final result. We hope this tutorial was useful!
No comments:
Post a Comment